
Creating stunning yet simple nail art at home offers New Yorkers a creative and accessible way to express personal style. Clean lines, geometric accents, and delicate dots form the foundation for versatile manicures that complement both professional workdays and evening events. With minimal tools and proper techniques, anyone can achieve salon-grade finishes at home.
Professional nail artistry transforms ordinary manicures into expressive statements. Fundamental techniques like striping, color blocking, and dotting provide endless design combinations that fit New York City’s fast-paced fashion culture.
Lasting DIY manicures depend on proper nail plate preparation and high-quality polishes. Clean, well-shaped nails ensure optimal adhesion for base coats, color lacquers, and high-shine top coats that resist daily wear.
Minimalist & Chic Nail Designs
Minimalist nail art captures modern urban elegance through clean negative space, precise lines, and understated neutral tones. These subtle designs suit corporate environments while providing refined style for weekend gatherings.
Classic White Stripes
Classic white stripe nail art creates crisp, linear contrast against neutral foundations such as nude, sheer pink, or soft beige. Striping tape ensures razor-sharp lines without bleeding onto the base color.
Apply a neutral base coat and let it dry completely before pressing striping tape firmly across the nail plate. Paint 2 thin coats of opaque white polish over the exposed area, removing the tape while the final coat remains wet to maintain sharp edges.
Line widths between 1–2 mm (0.04–0.08 in) deliver a delicate look, whereas lines measuring 3–4 mm (0.12–0.16 in) make a bolder graphic statement. Finish with a glossy top coat to seal edges and protect against chipping for 5–7 days.
Elegant Golden Stripes
Golden stripe designs introduce warm metallic luxury to neutral manicures using gold striping tape or metallic nail lacquer. Gold accents flatter warm and cool skin tones over nude, cream, or champagne bases.
Apply a protective base coat followed by 2 coats of neutral lacquer. Position metallic gold striping tape across the nail plate symmetrically for classic balance or diagonally for contemporary appeal.
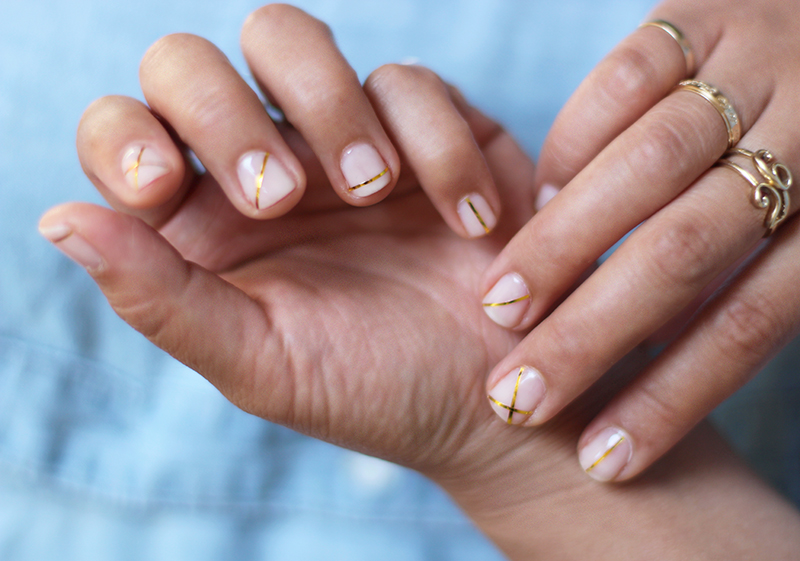
Pairing matte neutral bases with reflective metallic stripes creates sophisticated visual depth. Seal the tape edges thoroughly with 2 layers of clear top coat to ensure 7–10 days of durable wear.
Simple Polka Dots
Polka dot nail art combines playful charm with structured geometric spacing using a dual-ended dotting tool or the rounded tip of a bobby pin. Dot diameter and spacing dictate whether the finish appears subtle or bold.
Dip the dotting stylus into contrasting polish and gently press it onto a fully dried base coat. Beginners should start with 2–3 mm (0.08–0.12 in) dots, maintaining even spacing across the nail plate.
Crisp white dots over dark bases create timeless monochrome contrast, while metallic dots on neutral tones add understated sparkle. Allow dots to dry for 2 minutes before applying top coat to prevent smudging.
The Modern Diagonal French
The modern diagonal French manicure updates traditional white tips with crisp 45-degree angled lines that visually elongate the nail bed. This geometric approach suits short, squoval, and almond nails.
Position striping tape diagonally from 3–4 mm (0.12–0.16 in) on one side corner to 5–6 mm (0.20–0.24 in) on the opposite corner. Paint the exposed tip with opaque white, pastel, or metallic lacquer, peeling the tape away while the polish is damp.
Nude or soft pink foundations paired with white or champagne tips offer balanced proportions. Seal with a chip-resistant top coat to preserve clean tip boundaries for 7–10 days.
Two-Tone Neutral Nails
Two-tone neutral manicures divide the nail plate into balanced blocks using complementary shades like beige and taupe or blush and warm cream. This minimalist technique delivers visual interest suitable for conservative workplaces.
Apply striping tape vertically or horizontally across the dried base color to section the nail. Paint the second half with your complementary neutral shade and remove the tape immediately for a sharp boundary.
Vertical color divisions elongate shorter nails, while horizontal splits broaden narrower nail plates. A high-gloss top coat smooths the color seam and provides 7–10 days of chip-free wear.
Gilded Half Moons
Gilded half-moon manicures highlight the natural lunula at the base of the nail with radiant gold, silver, or rose gold polish. This vintage-inspired accent frames natural nail contours with subtle luxury.
Mask the bottom 2–3 mm (0.08–0.12 in) of the cuticle line using curved paper reinforcement stickers. Paint the exposed nail plate with deep lacquer, or apply metallic polish directly to the lunula while keeping the rest neutral.
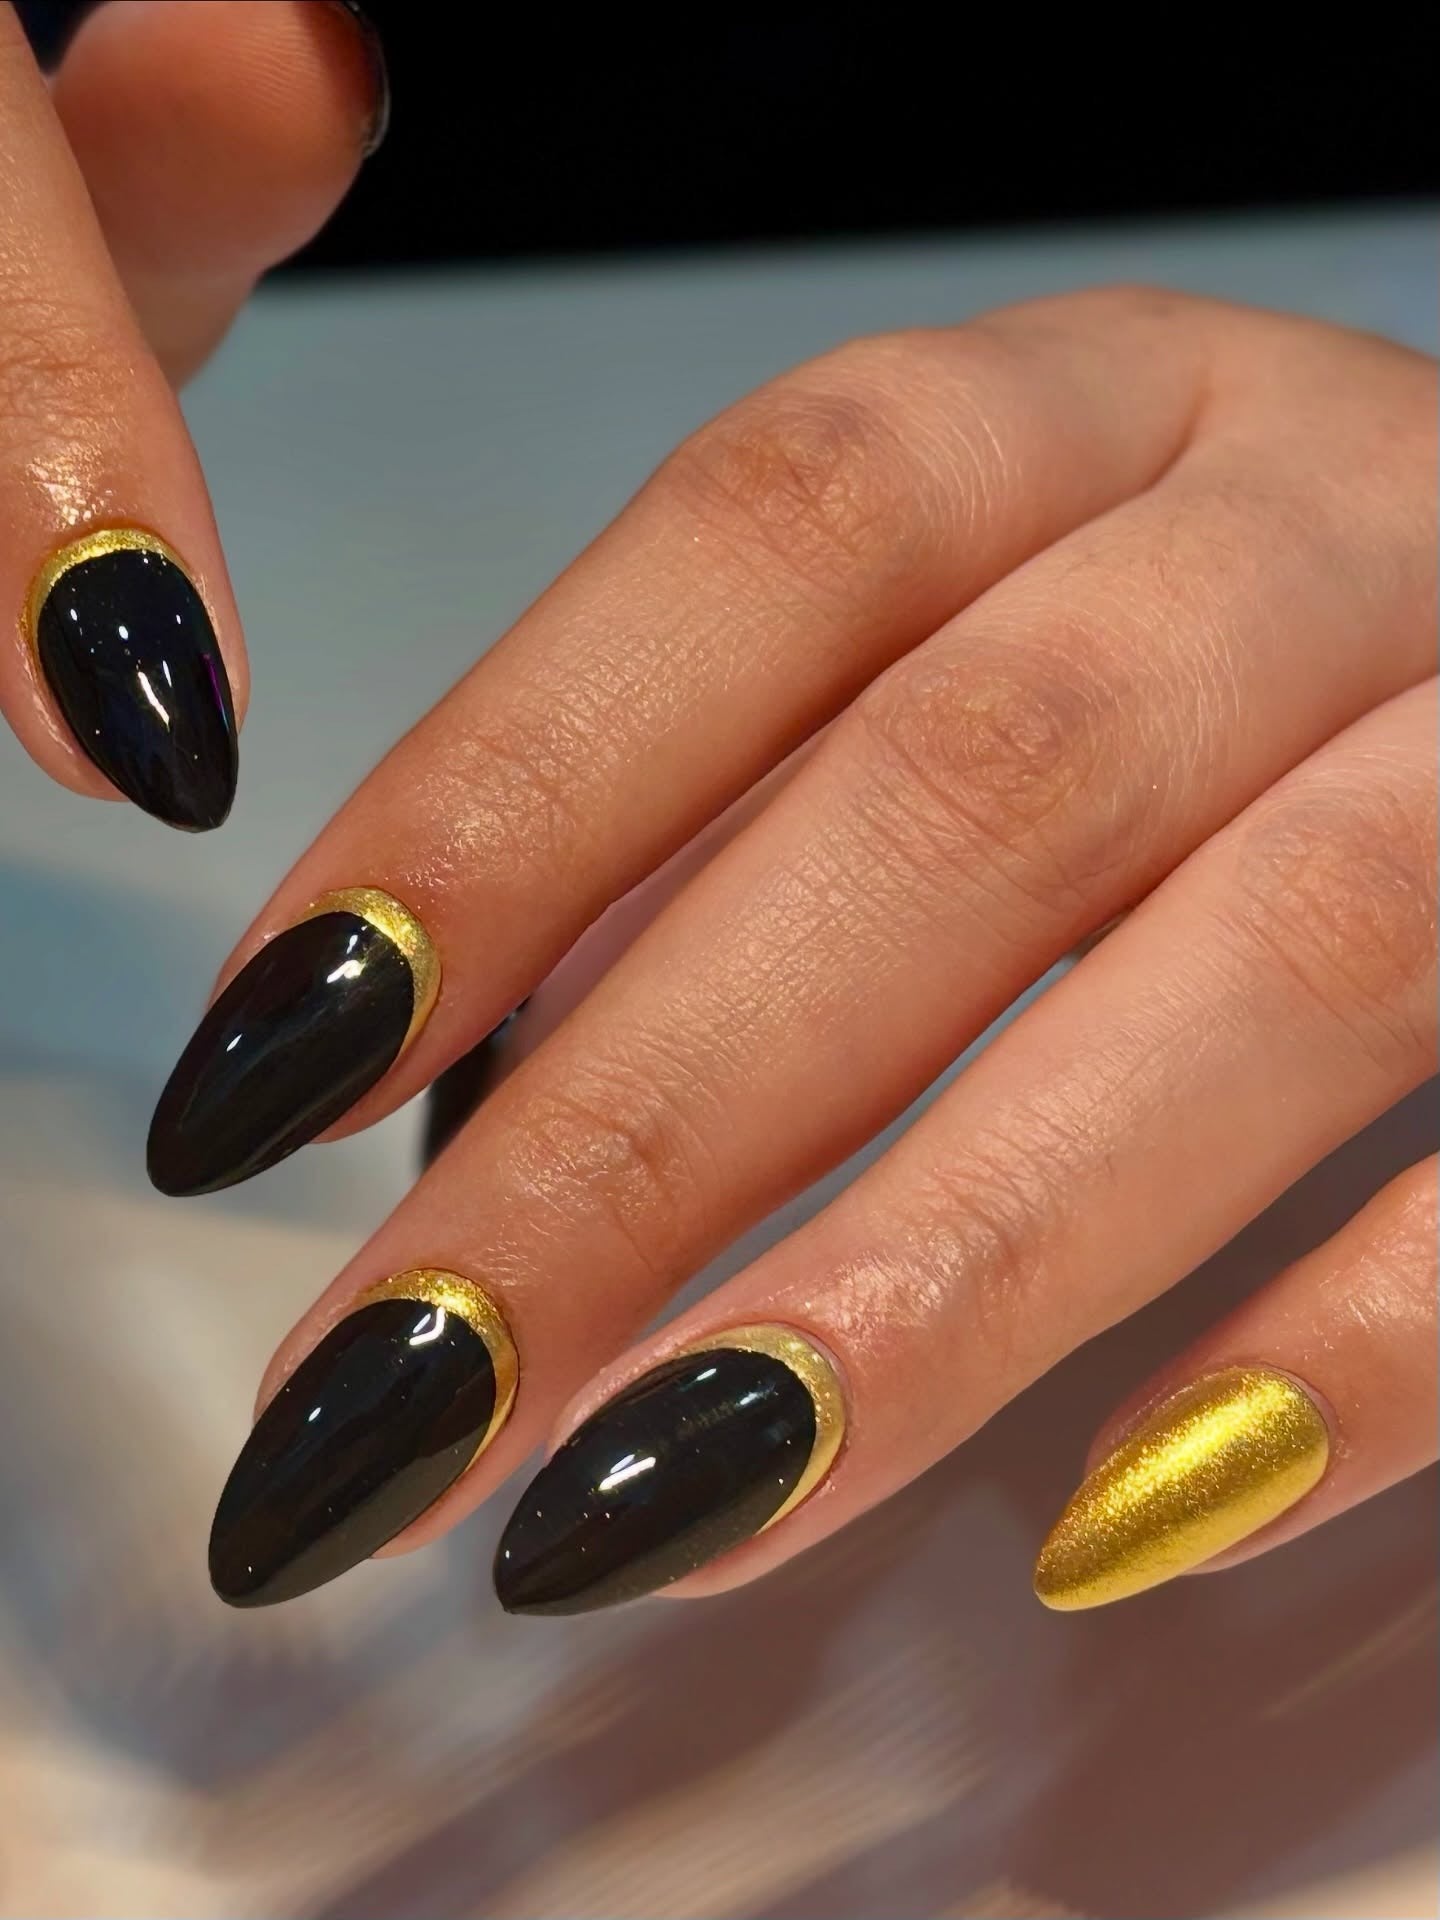
Peel the stickers away carefully before the polish sets to maintain a clean curved edge. Seal with top coat to prevent lifting along the cuticle margin, creating an eye-catching look for special occasions.
Playful & Fun Nail Art Ideas
Playful nail art incorporates cheerful motifs, vibrant pigments, and creative accents for casual outings and weekend styling. These expressive styles allow nail enthusiasts to showcase personal creativity without complex freehand painting skills.
’90s Inspired Daisies
Daisy nail art brings nostalgic floral charm through basic dotting techniques that form five-petal or six-petal blossom motifs. Cheerful floral patterns look fresh on pastel bases such as sky blue, soft yellow, or lavender.
Place a single yellow dot in the center of the nail plate using a medium dotting tool. Surround the central dot with 5 to 6 white dots using a smaller stylus to form uniform daisy petals.
Scatter 2 or 3 daisies across medium or long nails, varying flower dimensions between 2–4 mm (0.08–0.16 in) for natural composition. Apply a durable top coat to preserve the cheerful design for 5–7 days.
Smiley Face Accents
Smiley face nail art delivers upbeat energy through simple circular bases topped with expressive line work. This design works well as a focal statement on thumbs or ring accent nails.
Paint a bright yellow circular base measuring 3–5 mm (0.12–0.20 in) using a dotting tool or detail brush. Once dry, add 2 petite black dots for eyes and a clean curved stroke for the smile using a fine striper brush.
Customize expressions with winking eyes or subtle smirk angles across alternating nails. Seal with clear top coat to maintain vibrant, smudge-free art for up to 7 days.
Easy Confetti Party Nails
Confetti party nails celebrate festive milestones with multi-colored dots, miniature bars, and geometric flecks layered over neutral or clear bases. This textured approach adapts easily for birthdays, holidays, and celebrations like the 4th of July.
Start with a sheer nude or crisp white base coat. Use multiple nail lacquer colors to stamp random dots, dashes, and flecks ranging from 1–3 mm (0.04–0.12 in) across the nail surface.
Concentrate confetti elements densely along nail tips for a festive gradient effect, or space them evenly across all 10 fingers. Finish with 2 layers of glossy top coat to smooth surface irregularities.
Bold Statement Stars
Star nail art commands attention through sharp geometric angles and striking celestial contrast over deep navy, midnight blue, or black backgrounds. Metallic gold and silver finishes elevate the design.
Create 5-point stars using fine detail liner brushes or pre-cut nail stencils over a thoroughly dried dark base. Position a prominent 4–6 mm (0.16–0.24 in) star on accent nails, surrounding it with smaller metallic dots to mimic constellations.
Alternate star angles across accent fingers to generate dynamic movement. A high-gloss top coat protects metallic foils and delicate points from premature chipping for 7–10 days.
DIY Heart-Shaped Tips
Heart-shaped French tips replace traditional smile lines with sweet, romantic lobes at the free edge of the nail. This feminine style flatters oval, almond, and medium-length nails.
Place 2 medium-sized dots of red, pink, or white polish side by side at the free edge of the nail. Drag the polish downward from each dot toward the nail center with a fine detail brush to form a clean heart point.
Keep lobe sizes consistent across all fingers for a balanced appearance. Lock the heart contours under a protective clear top coat to enjoy 5–7 days of flawless romantic wear.
Simple Cow Print
Cow print nail art delivers modern animal-print style using organic, irregular black patches painted over a stark white base. The high-contrast monochrome palette matches contemporary streetwear and casual looks.
Apply 2 thin coats of opaque white nail polish and let them dry completely. Use a small detail brush or dotting tool to paint irregular, soft-edged black patches of varying sizes across the nail plate.
Leave generous negative white space between spots to maintain authentic markings. Seal with either high-gloss or velvety matte top coat for up to 7 days of wear.
Abstract & Modern DIY Designs
Embracing artistic freedom through non-representational patterns and flowing shapes, abstract nail art suits contemporary style preferences. Organic curves, asymmetrical swoops, and negative space create sophisticated visual flow.
Effortless Wavy Reds
Wavy red designs build dimensional movement by layering rich crimson, cherry, and burgundy curves across a bare or neutral nail plate. Fluid brush strokes soften bold red pigments into an artistic finish.
Paint 2 or 3 undulating wave lines from cuticle to tip using a fine striping brush loaded with contrasting red shades. Vary wave thickness from 1–3 mm (0.04–0.12 in) to mimic natural currents.
Allow overlapping pigments to dry slightly between layers to keep color lines distinct. Seal with a plumping top coat to create a seamless, glass-like surface that lasts 7–10 days.
A Sleek Color Swoop
Color swoop nail art features a single bold arc sweeping diagonally across the nail plate, pairing vibrant color with negative space. This minimalist approach elongates the finger with modern precision.
Paint a clean, sweeping arc from one lateral nail wall across to the opposite tip using a flat angled nail art brush. Choose saturated hues such as cobalt blue, terracotta, or emerald green over a sheer nude foundation.
Keep the curve angle and thickness consistent across accent nails for cohesive symmetry. Finish with a fast-drying top coat to prevent edge wear for 7–10 days.
Abstract Neutral Waves
Abstract neutral waves blend beige, taupe, cream, and soft espresso tones into soothing, organic contours. This understated palette suits corporate offices while displaying distinct artistic sophistication.
Sketch overlapping fluid lines across a sheer base using 3 harmonious neutral shades and a fine detail brush. Maintain balanced spacing between lines so the natural nail plate shines through.
Smooth transitions between tones by applying thin, even coats of lacquer. Finish with a chip-resistant top coat to preserve the gentle contours for 8–10 days.
Graphic Black and White Lines
Graphic line designs pair high-contrast black and white stripes, intersections, and grids for an editorial, modern aesthetic. Clean geometric lines create sharp visual impact.
Apply striping tape or a long-bristle striping brush to draw parallel, perpendicular, or intersecting lines across a matte or glossy monochrome base. Maintain uniform 1 mm (0.04 in) line thickness for salon-grade precision.
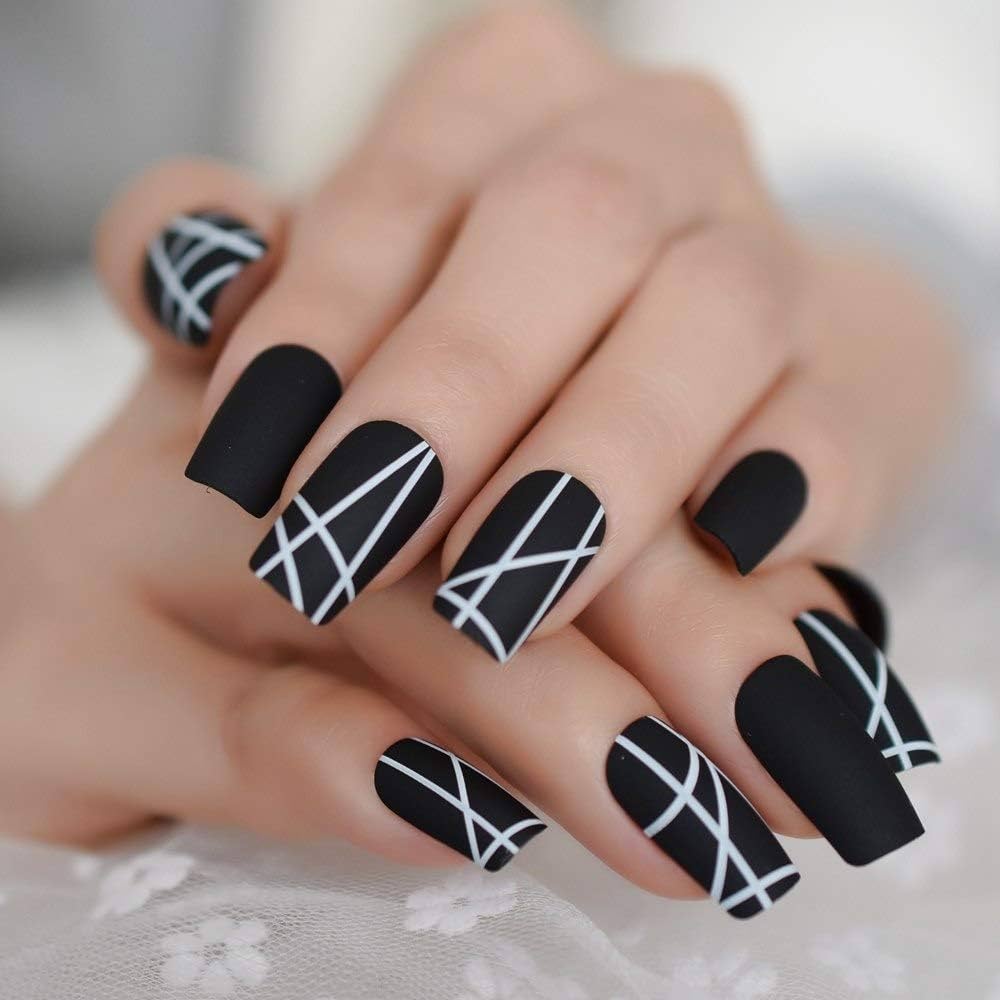
Remove tape immediately after painting or allow hand-painted lines to dry before applying subsequent strokes. Seal with a heavy-duty top coat to protect crisp borders against edge lifting.
Easy Geometric Accents
Geometric accent designs place simple triangles, chevrons, or color-blocked rectangles onto single accent nails for subtle modern sophistication. Limiting geometric elements to ring fingers keeps the manicure clean and workplace-friendly.
Apply straight nail tape to frame small triangles or rectangles at the cuticle or nail tip. Fill the masked area with metallic gold, silver, or bold black lacquer, removing the tape while wet.
Balance geometric shapes with clean negative space across the remaining nails. Seal with a durable top coat for 7–10 days of chip-free wear.
Glitter & Embellished Nail Art
Glitter and embellished nail art incorporate light-reflecting particles, rhinestones, and metallic foils to add texture and three-dimensional sparkle. These festive techniques transition everyday manicures into evening-ready statement looks.
Shimmering French Tips
Shimmering French tips modernize classic smile lines with fine champagne, silver, or rose gold glitter polish. This subtle sparkle maintains traditional elegance while catching light effortlessly.
Paint a sheer nude or soft pink base across all 10 nails. Use a glitter lacquer or sponge applicator to deposit concentrated sparkle along the free edge, creating a defined 2–3 mm (0.08–0.12 in) tip.
Layer a second glitter coat for full opacity or leave as a delicate shimmer veil. Apply a high-gloss top coat to smooth granular glitter texture and ensure 7–10 days of wear.
Subtle Glitter Gradient
Glitter gradient manicures feature a soft ombre fade, diffusing sparkle from the cuticle outward or cascading downward from the free edge. This gradual fade creates an elongating effect on the nail bed.
Apply a neutral base color and let it dry. Dab glitter polish onto a makeup sponge and press lightly onto the desired end of the nail, concentrating density at the edge and tapering toward the center.
Build sparkle gradually across 2 or 3 light sponge applications rather than painting thick layers. Seal with a leveling top coat to produce a glassy, touch-smooth finish.
A Simple Sprinkle of Glitter
Scattered glitter manicures achieve an organic, celebratory sparkle through loose glitter dust applied over fresh lacquer. This effortless technique adds dimensional glimmer in minutes.
Paint nails with your chosen base color. While the second coat remains tacky, sprinkle fine loose cosmetic glitter across selected zones using a fan brush or eyeshadow applicator.
Press glitter particles gently into the polish layer with a clean fingertip. Apply 2 generous coats of clear top coat to seal particles firmly and prevent snagging on fabric.
Embellished Statement Nails
Statement nail embellishments use flatback rhinestones, delicate pearls, or metallic studs to establish luxurious three-dimensional focal points on ring fingers. Strategic placement keeps the look sophisticated rather than crowded.
Apply base color and allow it to dry completely. Place tiny beads of nail glue or builder gel onto the nail plate, then position rhinestones or pearls using wax pickup pens or tweezers.
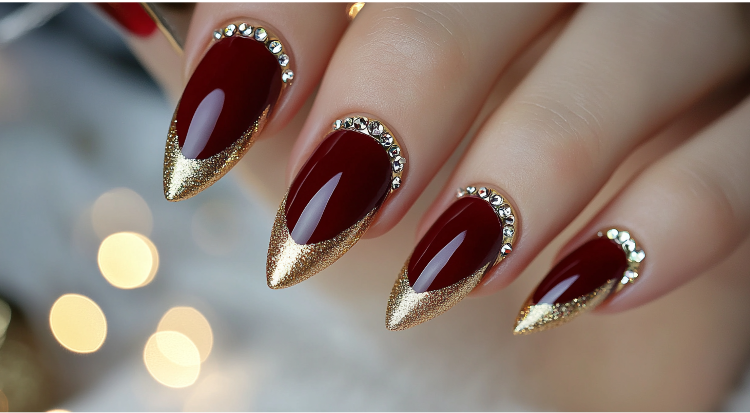
Gently press embellishments into place and cure or dry thoroughly. Outline the base of each stone with clear top coat using a detail brush to anchor edges securely for 7–10 days.
Essential Tools For Your At-Home Nail Art in New York
Salon-quality DIY nail art depends on reliable tools that provide precision, control, and consistent durability. Investing in well-crafted equipment saves time and elevates at-home manicures to professional standards.
Essential tools include:
- Base Preparation Essentials: High-grit nail files (180/240 grit), four-sided buffer blocks, cuticle pushers, and nourishing cuticle oil to prepare the nail plate.
- Precision Art Tools: Dual-ended dotting tools (1–5 mm or 0.04–0.20 in), long-bristle striping brushes, fine detail brushes, and tweezers for placing decals.
- Specialized Accessories: Clean-peeling striping tape, nail art stencils, and clean-up brushes dipped in pure acetone to sharpen borders.
- Quality Polish Formulas: Stain-preventing base coats, pigmented lacquers (such as OPI or CND), and quick-drying, chip-resistant top coats.
Cleaning metal tools with 70% isopropyl alcohol and storing brushes flat in dust-free cases protects bristles and maintains tool longevity for years of at-home creativity.
Pro Tips for a Perfect DIY Manicure with MobileNailNewyork
Achieving flawless DIY results requires patience, systematic preparation, and proper polish layering. These expert strategies prevent premature chipping and maximize manicure longevity.
Key professional practices include:
- Thorough Preparation: Remove natural oils and old polish completely, push cuticles back gently without cutting living tissue, and follow proper techniques on how to file nails in one direction to prevent edge splitting.
- Thin Layering: Apply 2 to 3 thin coats rather than a single thick layer. Thin coats cure evenly, eliminate air bubbles, and resist chipping.
- Capping the Free Edge: Run base coat, color polish, and top coat horizontally along the front edge of the nail to seal the tip against water and daily friction.
- Ongoing Maintenance: Reapply a thin layer of top coat every 2 to 3 days and massage cuticle oil daily into nail margins to preserve flexibility and high shine.
Get a Professional Nail Art Look at Home in New York with MobileNailNewyork
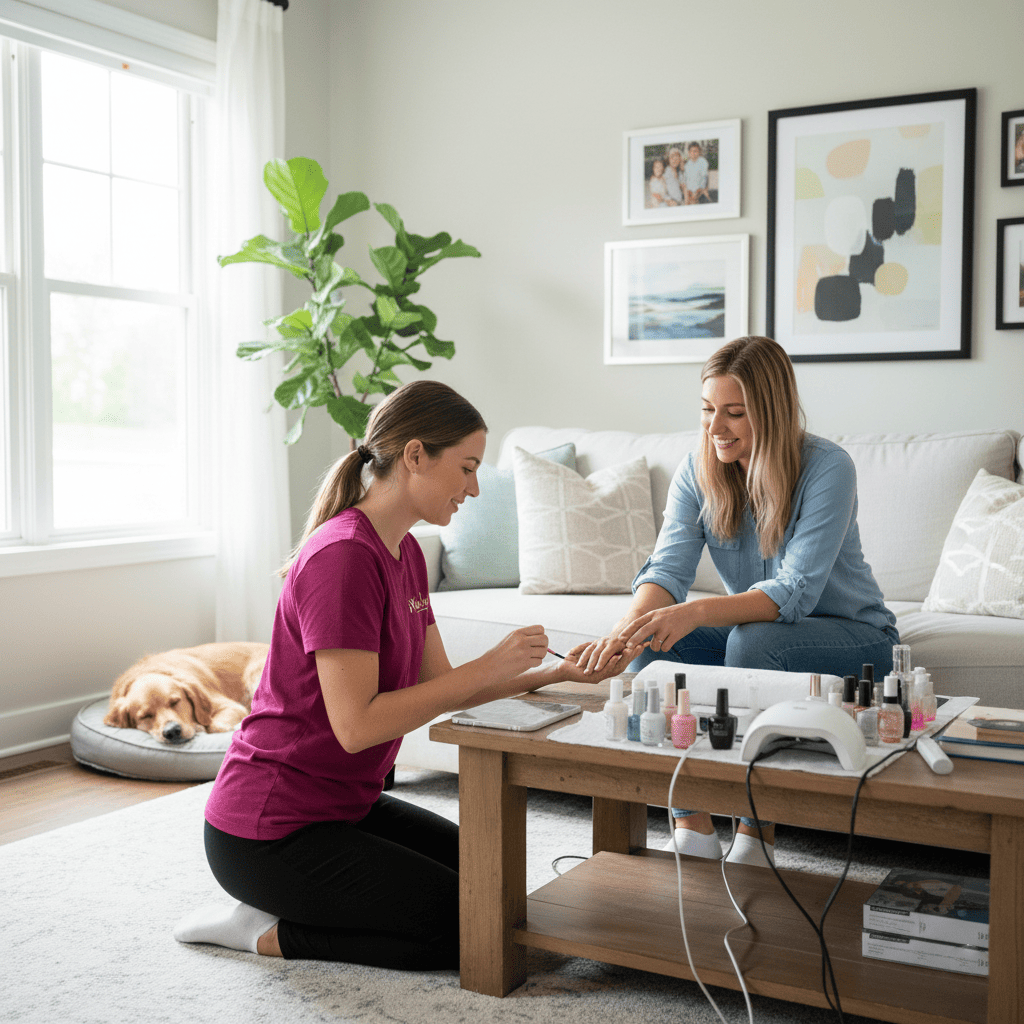
When busy schedules or intricate designs call for professional artistry, mobile nail services bring salon luxury directly to your home, office, or event space.
Nailuxe, a mobile nail service in New York City, delivers licensed nail technicians across Manhattan, Brooklyn, Queens, The Bronx, and Staten Island from 07:00 to 21:00 (7 AM–9 PM), seven days a week. Whether you book mobile nails brooklyn with a $0 travel fee or custom mobile nail art new york, licensed technicians bring a complete mobile studio case with metal tools steam-autoclaved at 121°C (250°F) for 30 minutes and opened in front of you. Five senior nail art leads turn reference photos into flawless, long-lasting custom sets backed by the Nailuxe 7-Day Care Promise.
Ready to elevate your nail art experience? Book your appointment with Nailuxe today:
- Brand: Nailuxe
- Operations Base: 191 Hancock St, Brooklyn, NY 11216, United States (no walk-in service)
- Hours: 07:00–21:00 (7 AM–9 PM), Monday to Sunday
- Phone: +1442-555-4022
- Email: [email protected]
- Website: https://mobilenailnewyork.com
